
If you’re experiencing a clicking or clunking noise from the rear of your PT Cruiser, chances are your Watts link (or Bell Crank, as it’s known in the U.S.) is worn out. This component, along with the two sway bars, is a crucial part of the rear suspension. Over time, the bushings and ball joints wear out, leading to noise and reduced handling performance.
In this guide, I’ll walk you through how to replace the Watts link and sway bar assembly step by step.
What You’ll Need
Tools & Equipment
✅ Jack and jack stands
✅ Impact wrench or breaker bar
✅ 18mm and 19mm sockets
✅ Torque wrench
✅ Penetrating fluid (e.g., WD-40)
✅ Rust remover/converter
✅ Cutting paste
✅ Old toothbrush (for applying lubricant)
Replacement Parts
✅ New Watts link (Bell Crank)
✅ Long sway bar link
✅ Short sway bar link
✅ New bolts (if necessary)
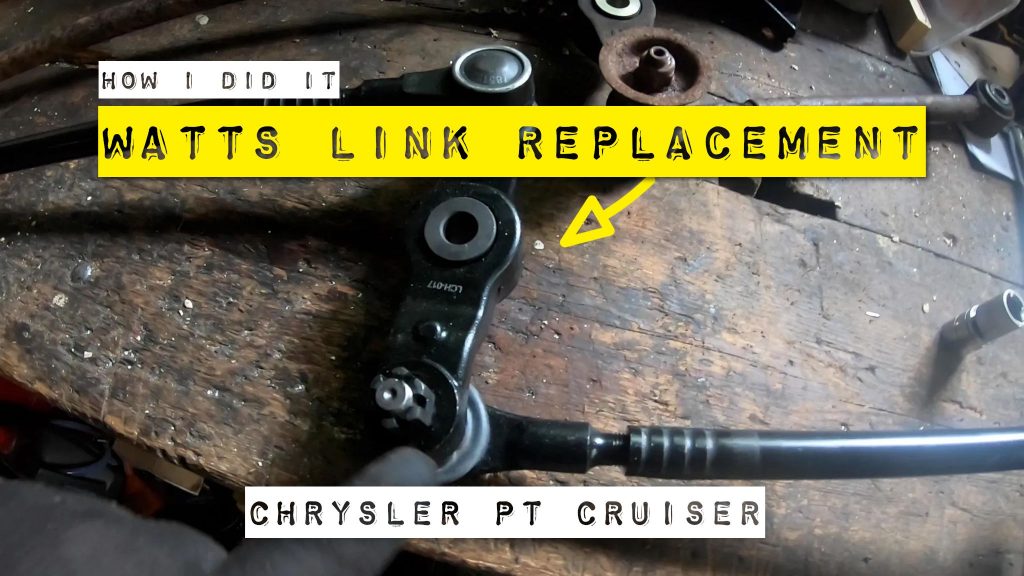
Step 1: Locate the Watts Link Assembly
The Watts link assembly is found at the center of the rear axle, connecting two sway bar links that extend to either side of the vehicle. The assembly consists of:
- The Watts link (Bell Crank) – The main pivot point in the center of the axle
- A short sway bar link – Connects the Watts link to the right side of the suspension
- A long sway bar link – Connects the Watts link to the left side of the suspension
Over time, the bushings and ball joints in this system wear out, creating a clicking noise when driving.
Step 2: Lift the Vehicle & Prepare for Removal
1️⃣ Jack up the rear of the vehicle and secure it with jack stands.
2️⃣ Remove the rear wheel for better access (especially on the problem side).
3️⃣ Spray penetrating fluid on the bolts and allow it to soak for at least 30 minutes.
Step 3: Remove the Old Watts Link & Sway Bars
1️⃣ Loosen & remove the three main bolts:
- Center Watts link bolt (21mm)
- Short sway bar link bolt (18mm)
- Long sway bar link bolt (18mm)
⚠️ Troubleshooting Stuck Bolts:
- Some bolts may be stuck due to rust or age (especially if they’ve never been removed).
- Use an impact wrench or a breaker bar with an extension to loosen stubborn bolts.
- If a bolt is still stuck, remove the brake caliper for better access.
👉 Pro Tip: If the bolt is rounding off, consider replacing it with a slightly larger 19mm bolt for easier maintenance in the future.
Step 4: Install the New Watts Link & Sway Bars
1️⃣ Pre-assemble the new Watts link and sway bars for easier installation.
2️⃣ Install the center Watts link bolt first, then attach the long and short sway bars.
3️⃣ Apply lubricant to the bolts before reinstalling them to make future removal easier.
4️⃣ Torque the bolts to manufacturer specifications:
- Watts link center bolt → 149 Nm
- Sway bar end bolts → 92 Nm
- Castle nuts (top & bottom of Watts link) → 14 Nm
5️⃣ Secure the castle nuts with cotter pins to prevent them from loosening over time.
Step 5: Final Adjustments & Test Drive
🔹 Some models may have a plastic cap on the top castle nut—if it doesn’t fit on the new part, don’t worry, as it doesn’t seem critical.
🔹 Once everything is torqued and secure, take the car for a short drive to ensure the clunking noise is gone and the suspension feels solid.
Conclusion
Replacing the Watts link and sway bars is a straightforward job—as long as you don’t run into stubborn bolts! With the right tools and patience, this repair can restore the smoothness of your rear suspension and eliminate that annoying clicking sound.
If you found this guide helpful, give it a thumbs up, subscribe to the channel, and stay tuned for more DIY car repairs! 🚗💨


