
If you love adventure, camping, and overlanding, having an organized vehicle setup can make all the difference. This guide will walk you through how I built a custom sliding drawer system for my car—complete with a fridge/freezer slide, utility drawer, and modular storage for Euro crates.
Planning the Layout
My goal was to maximize storage while keeping everything accessible and secure. Here’s what I wanted to achieve:
✅ Fridge/Freezer on a sliding drawer for easy access.
✅ A second sliding drawer to store my inflatable kayak, SUP, food, and cooking gear.
✅ Easy access to my underfloor batteries and emergency tools.
✅ Modular design, so I can remove or adjust components when needed.
I considered two approaches:
1️⃣ Build the sliding drawers on top of the existing floor.
2️⃣ Remove the factory floor and replace it with a one-piece plywood floor with a trap door for tool access.
I chose the second option for a cleaner, more functional build.
Step 1: Cutting the New Floor
I removed the factory floor and cut a new one-piece floor from 12mm plywood, using the old floor as a template. I also marked and drilled holes so I could bolt the floor down using the vehicle’s existing anchor points.
Securing the Floor
🔩 I discovered threaded holes in the back of the car—perfect for securing the floor.
📏 I measured carefully, transferred those marks onto the plywood, and drilled 12mm holes to bolt it down securely.
Step 2: Installing the Fridge/Freezer Drawer
With the floor secured, it was time to install the fridge slide:
1️⃣ Mounted heavy-duty ball-bearing sliders to the base of the fridge drawer.
2️⃣ Attached the drawer to the sliders with an extra piece of plywood for stability.
3️⃣ Secured the entire unit to the new plywood floor using angle brackets and low-profile screws.
Why Secure It?
A fridge drawer is heavy, especially when fully loaded. By anchoring it with brackets and bolts, it stays secure while driving. Plus, the design allows me to remove the second drawer if needed.
Step 3: Building the Modular Storage Drawers
For the left-hand side of the vehicle, I designed a dual sliding drawer system:
✔ Upper drawer – Flat, designed for stacking Euro crates.
✔ Lower drawer – Utility storage for my gas cooker and camping gear.
I used heavy-duty drawer slides and angled the back panels so they would press against the rear seats, adding extra stability.
Sizing the Drawers
📏 I used my portable gas cooker to determine the ideal height for the utility drawer.
🛠 I cut 12mm plywood into panels for the sides, base, and front of the drawers.
🎨 I painted everything black to give it a clean, finished look while keeping the wood grain visible.
Step 4: Final Assembly & Fitment
🔩 Installed the drawer slides at the correct spacing.
🔨 Assembled the utility drawer using screws and brackets.
⚙ Fitted the top drawer slide onto the heavy-duty runners.
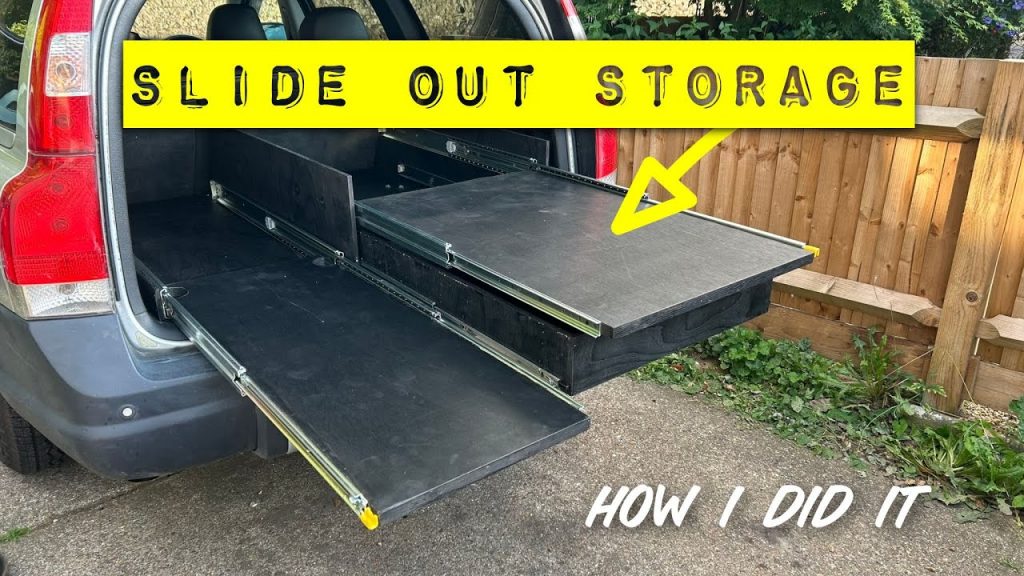
The final result? A strong, modular storage system that allows me to quickly access everything I need—whether it’s my fridge, cooking gear, tools, or adventure equipment.
The Finished Setup
✔ Fridge/Freezer drawer on the left, fully secured and sliding smoothly.
✔ Dual-drawer system on the right, providing modular and stackable storage.
✔ Bolted-down, one-piece floor with a trap door for underfloor tool access.
I’m super happy with how this turned out! Everything is now secure, organized, and easy to use—perfect for my upcoming adventures.
Final Thoughts & Lessons Learned
🔧 Measure twice, cut once. Planning is key!
🔩 Use existing anchor points in the vehicle whenever possible.
📦 Make it modular. The ability to remove or adjust parts is a game-changer.
🎨 A coat of paint goes a long way. It looks sleek and protects the wood.
If you enjoyed this build, give it a thumbs up, subscribe, and stay tuned for more adventures and DIY vehicle projects!
Cheers, and see you on the next adventure! 🚙🔧🔥