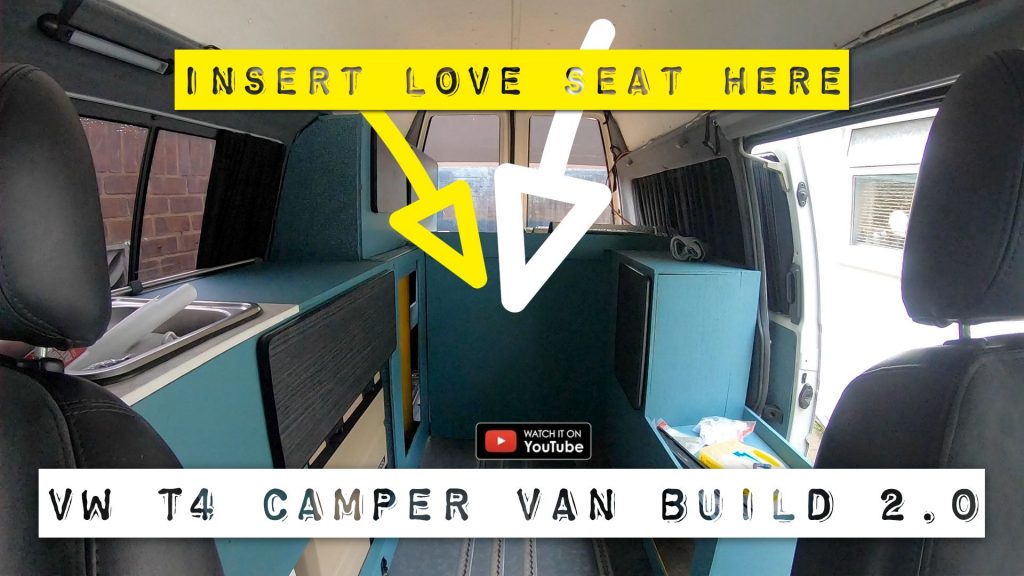
Every van build comes with unexpected challenges, and today was no exception. What seemed like a straightforward installation of a dual-seat setup turned into a problem-solving mission involving seatbelt buckles, headrests, and frame adjustments. But, after some serious modding and ingenuity, the love seat is finally in place!
The First Challenge: Seat Belt Buckles & Headrests
I had measured the space between the cabinets perfectly to fit the seat, but I completely overlooked the seatbelt buckles, which extended just beyond the space I left. This meant the seat wouldn’t fit as planned.
The next issue? The headrests weren’t easily removable. I had assumed they would just unclip, but they were designed to be non-removable—probably to stop kids from pulling them out and using them as weapons in a school bus!
The Solution
- Out came the grinder, and after some careful cutting and persuasion from my hammer (a.k.a. Jeremy Clarkson), the headrests were off.
- With that problem solved, I turned my attention to the seat frame positioning—and that’s where things got tricky.
Adjusting the Seat Frame for the Unwin Rails
The feet of the seat frame were about an inch too far to the right. Thankfully, they were adjustable—to a degree. However, they weren’t sliding rails, as I had originally thought. This meant I had to drill new holes to move the legs so they would fit onto the Unwin rails, which were already secured in the van.
To make sure everything aligned properly:
✅ I positioned the frame inside the van before drilling, ensuring it would fit.
✅ The seat did overhang the frame slightly, but since it was soft foam, it could compress into place.
✅ The real issue was still the seatbelt buckle mounting points, which were blocking the seat from moving back further.
The Workaround
Instead of struggling to modify the frame further, I decided to swap the seats around so that:
✔ The shoulder straps remained on the outside.
✔ The buckles moved to the center, preventing interference with the side panels.
Once I confirmed this would work, I used a set square to mark the center line of the Unwin rails and drilled pilot holes before widening them with a 10mm and then a 12mm bit.
Final Installation & Adjustments
With the new holes drilled, I bolted the frame legs into place using my Unwin T-bolts (which, despite being ridiculously overpriced, do the job perfectly).
Final Tweaks
✔ Sliding seat rails allowed me to adjust the seat’s positioning once mounted.
✔ The foam cushions made alignment a bit tricky, but with some wrangling, the seat bolted in securely.
✔ The fridge was slightly obstructing the right cushion, so I had to move the seat rails forward by 2 inches to compensate.
Mission Accomplished: The Love Seat is In!
Despite a few unexpected setbacks, the seat is now securely installed and perfectly aligned with the van’s layout. It’s comfortable, functional, and fully bolted down—ready for the next adventure!
If you enjoyed this van build update, give it a thumbs up, subscribe to the channel, and stick around for more DIY van life modifications.
Happy days! 🚐💨